The Belt Mountain-Bowen #5 Base Pin

A short treatise on the meaning of:(warning-requires fitting)
by MILESFORTIS.
2002. Last year, Dad and I rebuilt a Flattop Ruger .44 magnum into a .45 Colt Packin' Pistol. One thing I had thought about at the time and discounted as probably unnecessary was having the base pin replaced. I figured that, since the primary load for the
gun was going to be Winchester factory, the pin should stay put. With factory
loads, it did. Unfortunately, any hand load even beginning to approach factory
levels made the pin jump after two or three rounds at the most. I put off
replacing the pin until, just recently, it started coming lose after ten or
twelve rounds of factory ammo. Dad and I were over at the J-T Ranch recently and I mentioned to Jim that I was going to get a Belt Mountain base pin to solve the problem. Well, Jim hauled me into his shop and
pulled out a little manila envelope with one of the new #5 base pins with
Hamilton Bowen's screw-stop. It seems Kelye had sent him one to see what he
thought of it. Jim offered it to me in exchange for an article about fitting it
up. Dad and I found the time
to fit the pin and screw one Saturday afternoon and by the time we were done, we'd
spent a bit less than one hour getting the job done. I feel we were lucky as the
pin itself fit the gun perfectly and no fitting to the receiver was needed. The following illustrated steps
should give you a good basic idea of how to do the job. As always, you can click
on any of the images to look at a larger view Thank you for your kind
attention.
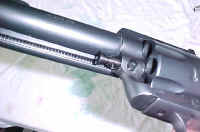
One. Lock up the gun in a medium vise. Use leather vise pads to prevent marring
of the finish. Remove the screw and insert the pin into the receiver.
Two, Using a hardened tool steel center punch (centered through the screw hole)
and light hammer, lightly whack a index mark on the barrel.
Jim told me that Kelye is developing some kind of jig to eliminate this
step The positioning of the index mark is the most critical part of the job. If
the mark is off, you will drill the hole off. This is not good, this is BAD.
Three. The tip of the screw measures .125" Dad decided to use a worn
.140" bit to drill the hole. Using a hand vise, begin to drill the hole
until the bevel of the working end of the bit has made a complete diameter cut.
Four, Lock gun into a drill press vise. Check for level of both long and cross
axis. Start up your drill press and SLOWLY drill a hole approx. .05" deep.
You really want a hole just deep enough to have visible vertical sides.
Five. Hand file the end of the screw down to fit the depth of the hole. This
really takes at least three steps as you should make small cuts with the file.
Put every thing back together, re-eyeball the fit and cut again until the head
of the screw fits down through the pin as far as it does with the pin out of the
gun. The tip of the screw should bottom out down the hole in the barrel. This does not have to
be exact but, you do want as much of the side of the tip to fit the side of the
hole as possible.
 Six, Put your gun back together and enjoy!